There is a Slack workspace for Computer Science students here at PSU. If you haven't already, create a Slack account, join the workspace at https://pdx-cs.slack.com and add the course channel linked on the course web page. All course communication will be done through this platform; check the pinned section for important updates. Note that the course has a corresponding webpage for more permanent information.
Setup account
- Visit the MCECS Gitlab site and create a private GitLab repo with the
ProjectNameabove. You will be using this repo for the rest of the term. This repo exists on the CECS intranet, and uses your CECS credentials for authentication. - Using the instructor and TA's OdinIDs from the course web page, grant them
Developeraccess to your repo. This will allow us to view your repo and provide feedback. - Create an initial blank submission for the first lab.
mkdir notebooks
touch notebooks/Labs1.pdf
git add notebooks
git commit -m "initial commit"
git push- Note that subsequent notebooks will follow this naming format, replacing the number with the lab notebook number being submitted..
Setup .gitignore
It is often the case that you'll have files in your local directory that you do not want added to your repository. To specify that these files should not be included in any commits, git uses a file called .gitignore. Create a .gitignore file that contains files that are common to Python that you do not want to add to your repository.
env/
.venv
*.pyc
__pycache__/
Add it to the files you wish to commit, commit the file to your local repository, and then push the local repository to its remote.
git add .gitignore
git commit -m "Adding .gitignore"
git push -u origin main
git basics
Read the first 6 steps of the following link. Note that for this class, you will be substituting Gitlab for GitHub. You will need to become proficient with the following git commands for this course or use an IDE such as VSCode that can perform the operations for you.
git clone: Fetch a copy of a remote repositorygit add: Add a new file and/or directory to local repositorygit commit: Commit changes to local repositorygit push: Merge changes from local repository to a remote one. Implicitly assumes "origin" (place that you retrieved repo from) and "main" (branch)git pull: Merge changes from remote repository to your local one. Implicitly assumes "origin" (place that you retrieved repo from) and "main" (branch)
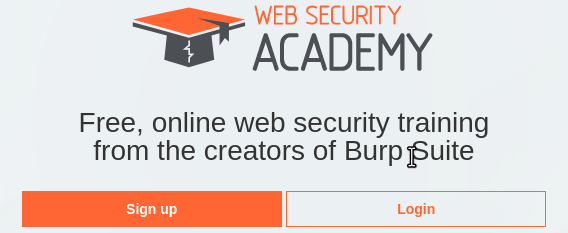
Visit https://portswigger.net/web-security and sign-up for an account using your pdx.edu e-mail address:
Incognito mode
To avoid applying the coupon you receive to the incorrect account, ensure that these steps are done in an "Incognito" or "Private Browsing" browser window to set up your account.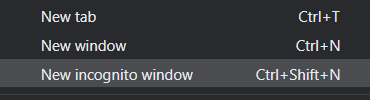
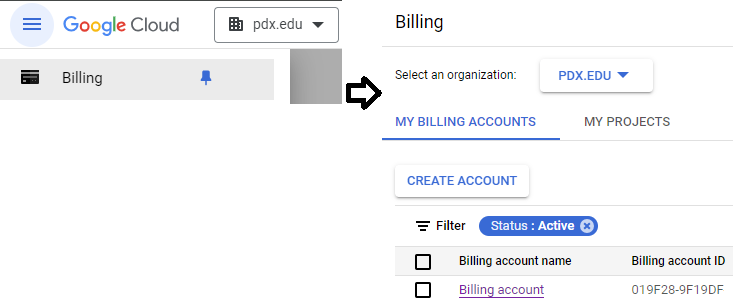
Then, visit https://console.cloud.google.com and login using your pdx.edu account to enable GCP. If you haven't used GCP yet and do not mind temporarily putting your credit card on the account, apply for the $300 coupon and use it to create a new billing account. Otherwise, visit the coupon redemption URL on the Canvas home page for the course (https://canvas.pdx.edu).
Create Project
Click on the pdx.edu organization from the console.

Then, click on "New Project"
Create a Google Cloud project with your ProjectName from above. You should be taken to your project's Home page. For your lab notebook, you will need to ensure that all of your screenshots for your Google Cloud labs include your ProjectName.
To examine your Billing account and its usage, go to the Billing page from the console at https://console.cloud.google.com/billing
First enable the Compute Engine API at https://console.cloud.google.com/apis/library/compute.googleapis.com. We will be using the two WebForPentester virtual machine images (#1 , #2) from PentesterLab. You can run these ISOs locally using VirtualBox if you prefer. A video screencast can be found here. However, for your convenience, rather than running from the ISO, we have hosted them as VM images on Google Cloud. Unfortunately, as these VMs are highly vulnerable, they can be discovered by adversaries and used for malicious purposes. To avoid having your VMs be hijacked, we will first need to set up some cloud-based firewall rules that configure access only from Portland State addresses.
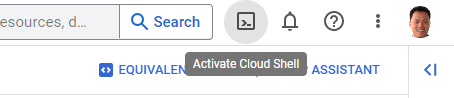
Google Cloud provides the gcloud command in its SDK for performing common platform tasks such as this. Cloud Shell is a convenient way for accessing the SDK. Visit the web console and click on the Cloud Shell icon to bring up the shell.
Firewall rules
For security reasons, traffic to VMs on Compute Engine is limited by default to a subset of services such as ssh. We must configure rules to allow access to the web servers we'll be running in subsequent labs for the course. In case the rules for allowing HTTP and HTTPS traffic have not been created yet for your project, run the following commands to create them.
gcloud compute firewall-rules create default-allow-http \
  --allow=tcp:80 --target-tags=http-server

gcloud compute firewall-rules create default-allow-https \
  --allow=tcp:443 --target-tags=https-server
The WebForPentester VMs are intentionally vulnerable. As a result, we want to restrict access to a limited number of sources in order to make it more difficult for adversaries to find and compromise our VMs. In this step, we will create another rule that specifies that only incoming HTTP traffic coming from Portland State University will be allowed. Specifically, the command:
- Creates a new firewall rule called "
pdx-80" with a target tag of "pdx-80". The rule is applied to any VM that has specified the tag in its configuration. - Specifies it to be applied to incoming (ingress) traffic on TCP port 80
- Specifies for its source IP address ranges Portland State's Class B prefix given in CIDR notation:
131.252.0.0/16.
gcloud compute firewall-rules create pdx-80 \
  --allow=tcp:80 --source-ranges="131.252.0.0/16" \
  --target-tags=pdx-80 --direction=INGRESS
We will then do the same for ssh.
gcloud compute firewall-rules create pdx-22 \
  --allow=tcp:22 --source-ranges="131.252.0.0/16" \
--target-tags=pdx-22 --direction=INGRESSInstantiate the VM
From the web console, launch Cloud Shell. Within it, run the command below to find the names of the WebForPentester images in the course's GCP project (pdx-cs).
gcloud compute images list --project pdx-cs --no-standard-imagesExamine the images available and find the name for the WebForPentester 1 image (e.g. wfp1-nofilter). Make a note of the name of the image, then fill in the gcloud command below and launch a VM using the image.
gcloud compute instances create wfp1-vm \
  --machine-type e2-micro --zone us-west1-b \
  --tags=pdx-80,pdx-22 --image-project pdx-cs \
  --image <FMI>
Visit the site
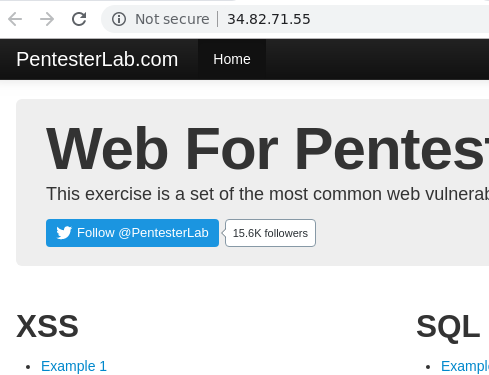
Wait several minutes for the VM to spin up. Visit the web site at the external IP address of the resulting VM (http://<IP_Address>)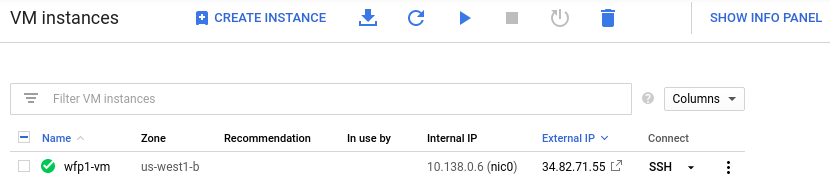
This should bring up the landing page for the first Web For Pentester site. If you can not access the site, it is likely that you have not added your IP address in the prior firewall rules.
Stop the VM
We will not be using the VM until later in the course. To save credits, stop the instance.
gcloud compute instances stop wfp1-vm --zone us-west1-bInstantiate the VM
Repeat the following process for the second WFP site. Name the instance wfp2-vm and place it in us-west1-b. As before, specify the "pdx-80" and "pdx-22" tags so that access is only allowed from Portland State addresses. Note that the site takes some time to load once brought up.
gcloud compute instances create wfp2-vm \
--machine-type e2-medium --zone us-west1-b \
--tags=pdx-80,pdx-22 \
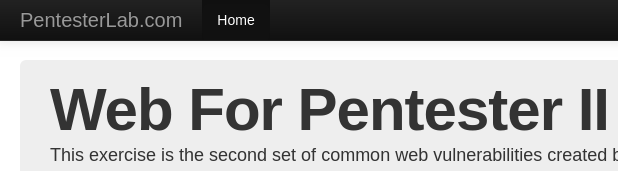
--image-project pdx-cs --image <FMI> Visit the site
As before, wait several minutes for the VM to spin up. Visit the web site at the external IP address of the resulting VM (http://<IP_Address>).
Stop the VM
We will not be using the VM until later in the course. To save credits, stop the instance.
gcloud compute instances stop wfp2-vm --zone us-west1-b