

Ollama is a framework that makes it easy to run open-source large language models such as Mistral and Llama. Because we are running the model ourselves, it requires us to deploy a machine with a GPU attached.
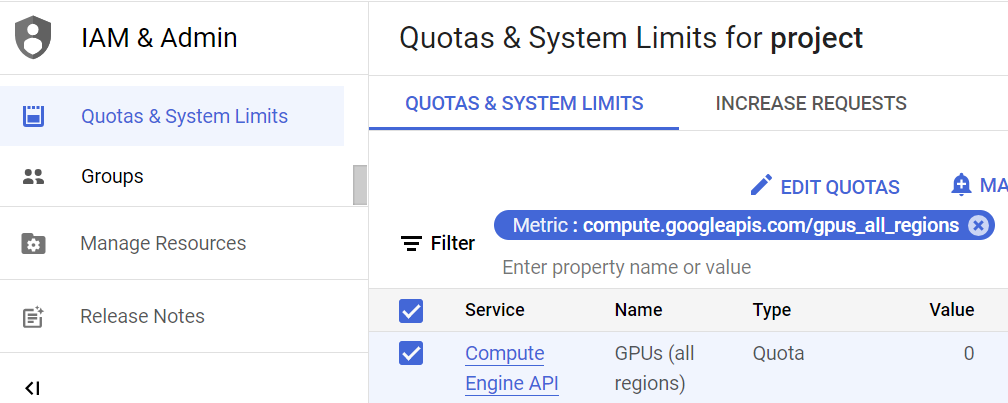
By default, GCP projects have quotas on resources that disable GPU usage. Visit the Google Cloud Platform console and then navigate to the IAM part of the platform "Quotas and System Limits" section of IAM. A direct link to it is here. Filter on "gpus_all_regions" and edit the quota to request a change to "1". It will ask you to submit a quota request. Follow the steps and you will receive an email. The email will say it will take up to 2 business days to process your request, but you should receive a follow up email within a few minutes. We'll be using an NVIDIA T4 GPU. Check that its quota is set to "1" by searching for "nvidia_t4_gpus"
Visit the Google Cloud Platform console and bring up Cloud Shell.

Create a firewall rule with a tag ollama that allows port 80 (for the web interface) and port 11434 (for the API interface) to the Ollama server.
gcloud compute firewall-rules create allow-ollama \
  --allow=tcp:80,tcp:11434 --target-tags=ollama
Then, launch a Compute Engine VM with the command below. To reduce costs, we'll run Ollama on a pre-emptible Compute Engine VM. The command attaches an NVIDIA GPU and runs a Linux OS with CUDA support to the pre-emptible, spot instance. The instance is set to run for a maximum of 3 hours.
gcloud beta compute instances create ollama \
  --machine-type=n1-standard-4 \
  --accelerator="type=nvidia-tesla-t4,count=1" \
  --boot-disk-size=200GB \
  --image-family=common-cu121-py310 \
  --image-project=deeplearning-platform-release \
  --provisioning-model=SPOT --max-run-duration=3h \
  --maintenance-policy=TERMINATE \
  --instance-termination-action=STOP \
  --tags=ollama --zone=us-west1-b
Click on ssh when the instance is ready.

You'll be prompted to install the NVIDIA drivers. Type 'Y' to do so.
Run the following commands to add the signing keys to the NVIDIA container repository.
curl -fsSL https://nvidia.github.io/libnvidia-container/gpgkey \
 | sudo gpg --dearmor -o /usr/share/keyrings/nvidia-container-toolkit-keyring.gpg \
 | curl -s -L https://nvidia.github.io/libnvidia-container/stable/deb/nvidia-container-toolkit.list \
 | sed 's#deb https://#deb [signed-by=/usr/share/keyrings/nvidia-container-toolkit-keyring.gpg] https://#g' \
 | sudo tee /etc/apt/sources.list.d/nvidia-container-toolkit.list

sudo apt update
Then, install the NVIDIA container toolkit and configure it to utilize docker.
sudo apt install -y nvidia-container-toolkit
sudo nvidia-ctk runtime configure --runtime=docker
sudo systemctl restart docker
Finally, run both the Ollama API server on its default port 11434 and the Ollama web interface on port 80.
docker run -d --gpus=all -v ollama:/root/.ollama \
-p 11434:11434 --name ollama --restart always ollama/ollama
docker run -d -p 80:8080 --add-host=host.docker.internal:host-gateway \
-v ollama-webui:/app/backend/data --name ollama-webui \
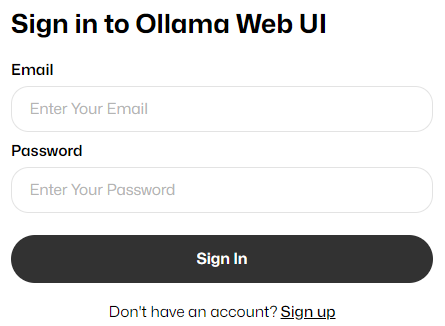
--restart always ghcr.io/ollama-webui/ollama-webui:mainGo back to Compute Engine and visit the Ollama web interface (e.g. http://35.230.93.16 below)
Sign up for a new account using the web interface to create the initial administrator account.
Initially, no models are installed. To install models, click the "Settings" icon where you are asked to select a model for a chat.

Then, visit the "Models" section which provides an interface to pull models available from ollama.com.
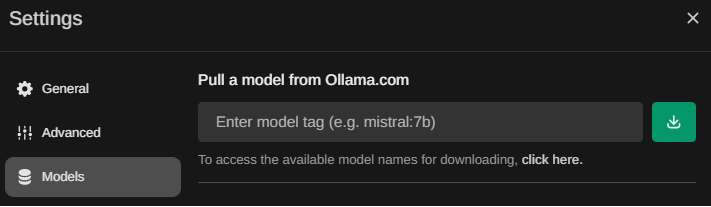
Entering in the name of the model, then clicking the green download button will download, verify and install the model for use in the web interface. Visit the Ollama library to find the names of additional models you'd like to experiment with for the class and download each of them. A variety of LLM benchmarks have been performed on various models. One can visit one LLM leaderboard here: https://huggingface.co/spaces/HuggingFaceH4/open_llm_leaderboard
- Download and install a Llama model along with any others you wish to experiment with for the course.
For each model you've installed, select it in a new chat, and send it a prompt to ensure the model is functional. Note that the model takes some time to load when first used so patience is necessary!
