Incognito mode
To avoid applying the coupon you receive to the incorrect account, ensure that these steps are done in an "Incognito" or "Private Browsing" browser window to set up your account.
Then, visit https://console.cloud.google.com and login using your pdx.edu account to enable GCP. If you haven't used GCP yet and do not mind temporarily putting your credit card on the account, apply for the $300 coupon and use it to create a new billing account. Otherwise, wait for the instructor to email you a course coupon.
Create Project
Click on the pdx.edu organization from the console.

Then, click on "New Project"
Create a Google Cloud project with your ProjectName from above. You should be taken to your project's Home page. For your lab notebook, you will need to ensure that all of your screenshots for your Google Cloud labs include your ProjectName.
To examine your Billing account and its usage, go to the Billing page from the console at https://console.cloud.google.com/billing

The course requires the use of a Ubuntu Linux VM. We can set one up in the cloud for this purpose. Begin by visiting the Compute Engine Google Cloud console at https://console.cloud.google.com/compute .
Option #1: Cloud Shell
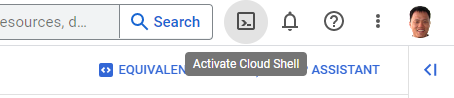
To launch a VM using Cloud Shell, go to the web console and click on the Cloud Shell icon as shown:

Cloud Shell consists of a container with the Google Cloud SDK pre-installed. As part of the SDK, the gcloud command-line interface is included. The command is similar to other cloud CLIs such as aws in that it supports sub-commands that specify which cloud service is being accessed. For example, the command gcloud compute create instances will create a virtual machine instance based on the parameters provided. Use the command below to instantiate the VM in the us-west1 region.
gcloud compute instances create course-vm \
  --image-family=ubuntu-2204-lts \
  --image-project=ubuntu-os-cloud \
  --boot-disk-size=20G \
  --zone=us-west1-b \
  --machine-type=e2-medium
Option #2: Web console
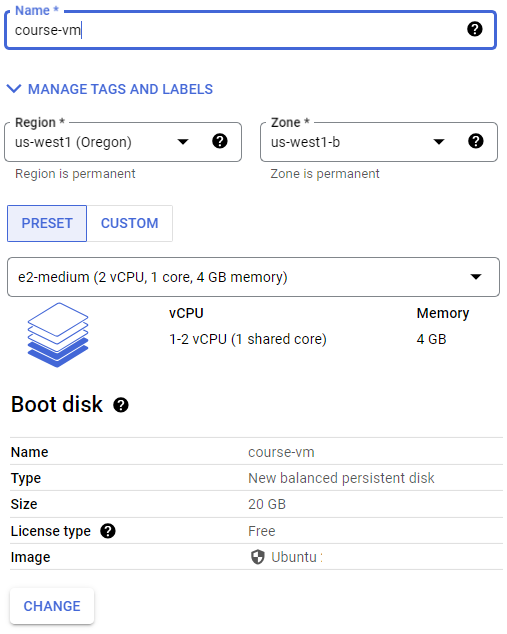
One can also launch VMs via the web console. Navigate to the Compute Engine service at https://console.cloud.google.com/compute and create a Ubuntu 22.04 LTS amd64 instance. Configure the name, region, zone, and boot disk in the UI. Ensure you select a boot disk size of at least 20GB. Then, launch the instance.
We will now setup a remote desktop on the Compute Engine using the Remote Desktop Protocol (RDP) in order to enable a graphical interface to the VM.
Connect to instance
To connect to the instance from Cloud Shell, you can run the command below:
gcloud compute ssh course-vmAlternatively, you can also connect via the web console. To do so, navigate to the VM instances on Compute Engine, then click on "ssh" to bring up a shell session on it.
Setup
On the VM, install the course's development tools.
sudo apt update
sudo apt install python3-pip python3-dev python3-virtualenv git -y
Then, install docker and its packages. Add yourself to the docker group so that you're able to run the docker commands without sudo.
sudo apt install docker.io -y
sudo usermod -a -G docker $(whoami)
Next, install the graphical software packages.
sudo apt install xfce4 xfce4-goodies xrdp -yCheck that the xrdp daemon is enabled and running.
sudo systemctl status xrdpIf not, start it.
sudo systemctl start xrdpOur RDP setup will require a username and password to authenticate. As Compute Engine instances typically perform authentication via OAuth2 and ssh keys, we will need to set a password for our account on the VM. To do so, run the following to set your account password on the VM for your username (as retrieved via the environment variable $USER).
sudo passwd $USERInstall a web browser
If you prefer Firefox, install it directly.
sudo apt install firefox -yIf you prefer Chrome, then install Google's signing key, add Google's repository to your system, and then install the browser.
wget -q -O - https://dl.google.com/linux/linux_signing_key.pub | sudo gpg --dearmour -o /usr/share/keyrings/google_linux_signing_key.gpg

sudo sh -c 'echo "deb [arch=amd64 signed-by=/usr/share/keyrings/google_linux_signing_key.gpg] http://dl.google.com/linux/chrome/deb/ stable main" > /etc/apt/sources.list.d/google.list'

sudo apt update

sudo apt install google-chrome-stable -y
Connect via RDP
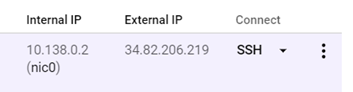
On your local machine, connect to the VM's External IP address (shown above in the web console) using an RDP client. You may utilize clients that are built into the browser (e.g. Chrome Remote Desktop extension) or native clients on Windows (Remote Desktop Connection), MacOS (Microsoft Remote Desktop), or Linux (FreeRDP or remmina) to connect to the VM.

Then, login using your username and the password you set for it to bring up a graphical desktop on the VM.
Stop the VM
In order to save costs while keeping the machine image around so that it can be started later, exit out of the session and stop the VM. This can be done via the UI or via the command-line in Cloud Shell via:
gcloud compute instances stop course-vmWe'll be using Google's Gemini Pro as one of our models as it can be run via the course coupon and does not require students to use a credit card. The model can be easily leveraged by programs running outside of Google Cloud. To do so, we'll first need to enable its API. Navigate to the web console at https://console.cloud.google.com/, then launch Cloud Shell.
Run the following command to enable the API.
gcloud services enable generativelanguage.googleapis.comThen, visit your project's "APIs & Services" and navigate to the "Credentials" section. Create a new API key.

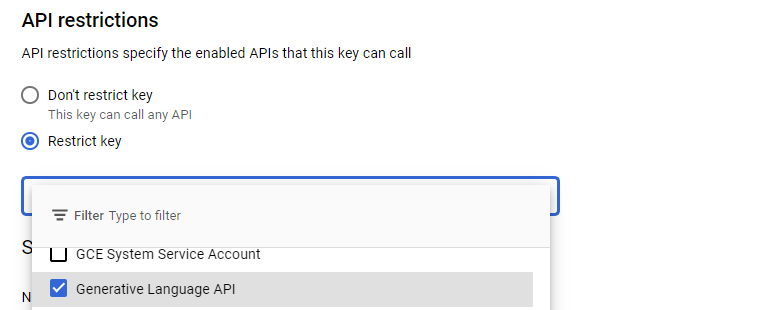
Edit the key and restrict its access to the Generative Language API that we've just enabled.
On the Linux VM, set an environment variable that contains the value of the API key.
export GOOGLE_API_KEY="<FMI>"Note that you can add this to your .bashrc file to automatically set the key when you login each time.
We'll be using GitLab for the course's source control. Create an account via Google using your @pdx.edu email address by visiting https://gitlab.com/users/sign_up.
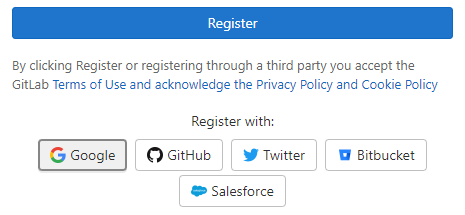
Upon completion, use the same credentials to login to GitLab. After logging in you should see the following:

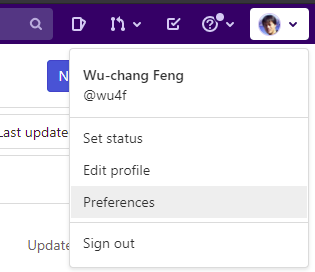
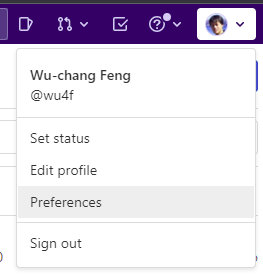
Go to the upper right hand corner and click on the dropdown that is your user profile. You should see the option for "Preferences". Click on this option and you'll be taken to a page for customization of your avatar, status, and main settings.
In the left hand column there is an entry for SSH Keys. Select that entry and wait here. We're going to create a local public/private key pair to securely transfer data between the local repository and this remote hosted by GitLab.
SSH Keys
We will now create a local public/private ssh key pair to securely transfer data between a local git repository and this remote hosted by GitLab. On your Linux VM, change into the directory where SSH keys are stored:
cd ~/.ssh/
If you have not setup an SSH key before, perform the following
ssh-keygen -t rsa
We're specifying rsa here for clarity, although this is the default encryption method. Hitting enter will create a file named id_rsa which we'll use as an example. You should now have two files containing the key-pair in the ~/.ssh/ directory. One has a .pub extension and is your public key. The other is your private key and should never be revealed.
We will now add this public key to GitLab. Dump the contents of the key out:
cat id_rsa.pub
Then, copy and paste this into the SSH key field on GitLab in your browser. Finally, click "Add Key".
Create Project
Go back to the projects page and create a "New project" that is blank. 
Name the new project via the ProjectName above. Within the project's setup, make sure the repository is marked "Private" and initialize it with a README file.
Invite Instructor and TA as project developers
Next, go to the Settings tab and select members. From here you can add members to your project by typing in their username. Add the instructor and the TA as Developers to your project via their pdx.edu e-mail addresses (e.g. <OdinID>@pdx.edu where OdinID can be found on the course web page).
 Setup client
On your Linux VM, set up your name and e-mail address for git.
git config --global user.name "<FirstName> <LastName>"
git config --global user.email "<OdinID>@pdx.edu"
Then, clone the repository to your machine and change directories into it.
git clone git@gitlab.com:<GitLab-Username>/<ProjectName>.git
cd <ProjectName>
We will now edit our first file and commit its changes to our repository. To do so, bring up the README.md file in an editor. The file is expected to be in the Markdown format. Examine this cheat sheet and add multiple styles of titles and lists to the file. Then, stage the file for addition, commit the file to the local git repository, then push the local commits to the remote version on GItLab.
To add the file to the list of changed files that you want to stage to commit, use the following:
git add README.md
To commit the file that has been staged into the local git repository, use the following:
git commit -m "add README"
Finally, to push the copy of the local repository with the changes over to the remote repository on Gitlab, use the following:
git push -u origin main
.gitignore
It is often the case that you'll have files in your local directory that you do not want added to your repository. To specify that these files should not be included in any commits, git uses a file called .gitignore. Create a .gitignore file that contains files that are common to Python that you do not want to add to your repository.
env/
*.pyc
__pycache__/
Add it to the files you wish to commit, commit the file to your local repository, and then push the local repository to its remote.
git add .gitignore
git commit -m "Adding .gitignore"
git push -u origin main
git basics
Read the first 6 steps of the following link. Note that for this class, you will be substituting Gitlab for GitHub. You will need to become proficient with the following git commands for this course or use an IDE such as VSCode that can perform the operations for you.
git clone: Fetch a copy of a remote repositorygit add: Add a new file and/or directory to local repositorygit commit: Commit changes to local repositorygit push: Merge changes from local repository to a remote one. Implicitly assumes "origin" (place that you retrieved repo from) and "main" (branch)git pull: Merge changes from remote repository to your local one. Implicitly assumes "origin" (place that you retrieved repo from) and "main" (branch)
ChatGPT

ChatGPT is OpenAI's Large Language Model service. Visit ChatGPT's site at https://chat.openai.com/. Sign in using your PSU e-mail address.
Gemini

Gemini is Google's multimodal Large Language Model service. Visit Google's Gemini site at https://gemini.google.com/app. Note that you may need to use a personal Google account to access the web service.
Copilot

Copilot is Microsoft's multimodal Large Language Model service. Visit Microsoft's Copilot site at https://copilot.microsoft.com/ . Sign in using your school account and e-mail address.
Perplexity

Perplexity AI is a conversational search engine that answers queries using natural language predictive text. Visit the Perplexity site at: https://www.perplexity.ai/ . Create an account using your school e-mail address.
Claude

Claude is an AI assistant from Anthropic. It allows for free usage, but with limited features. Visit the site at: https://claude.ai/ . Create an account using your school e-mail address. Note that if you do not feel comfortable supplying a phone number to create an account, skip this step.

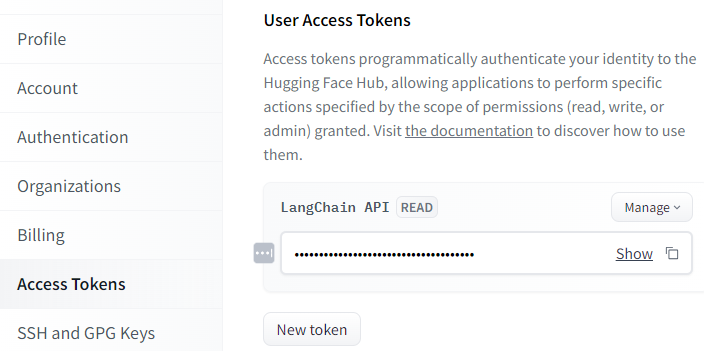
Hugging Face is an open platform that supports the sharing of machine learning models. It also supports the hosting of inference endpoints in a serverless fashion. Visit the site at https://huggingface.co/ and sign up for an account. Once you have created the account, sign-in and visit your profile. Within the profile, you will find a section that allows you to create an access token. We will be using this token to enable access to Hugging Face endpoints from LangChain. Create a new token.
When utilizing Hugging Face models on the Linux VM, we'll need to set an environment variable that contains the value of the API key.
export HUGGINGFACEHUB_API_TOKEN="<FMI>"Note that you can add this to your .bashrc file to automatically set the key when you login each time.
Visit https://portswigger.net/web-security and sign-up for an account using your pdx.edu e-mail address:

For some of the LangChain agents, we'll be utilizing SerpApi for external calls to Google's search engine. Doing so allows the access to real-time information to search engine content. Visit the site at https://serpapi.com .
Register for a free account using your PSU e-mail address. This will allow you 100 API calls per month. Then, visit the Dashboard and find your API key.

When utilizing the API on the Linux VM, we'll need to set an environment variable that contains the value of the API key.
export SERPAPI_API_KEY="<FMI>"Note that you can add this to your .bashrc file to automatically set the key when you login each time.
VirusTotal is a malware analysis and threat intelligence service that aggregates reports of malicious activity and files across the Internet. It is an invaluable tool for organizations to protect themselves against emerging threats. We will be using this service in conjunction with LLMs to automatically collect and process real-time threat information.
In order to access the VirusTotal API, we need to create a free account. Visit https://virustotal.com and sign up for an account with your PSU e-mail address. Then, within the user-interface, obtain an API key that will allow you to access the service programmatically.

Generate an API key and copy it.

When utilizing the API on the Linux VM, we'll need to set an environment variable that contains the value of the API key.
export VIRUSTOTAL_API_KEY="<FMI>"Note that you can add this to your .bashrc file to automatically set the key when you login each time.

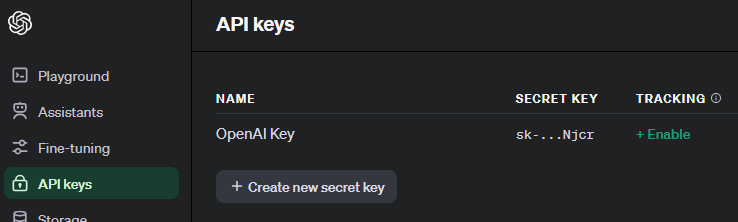
Many of the code examples one might find on the Internet that utilize Language Models will be written for OpenAI's API. Unfortunately, this requires one to create an account that is backed by a credit card. As a result, creating an account on OpenAI is optional. If you wish to do so, visit https://openai.com.
After creating the account, visit the settings page and create a new key.
When utilizing the API on the Linux VM, we'll need to set an environment variable that contains the value of the API key.
export OPENAI_API_KEY="<FMI>"Note that you can add this to your .bashrc file to automatically set the key when you login each time.