One of the more common LLM applications is a "retrieval augmented generation" (RAG) one which leverages in-context learning to allow an LLM to answer questions based on up-to-date information retrieved after the model has been trained. Such an approach solves the problem of generative models producing or fabricating results that are incorrect, sometimes referred to as hallucinations. Consider the application below where a user wants to ask a question to a set of documents in a knowledge base. With RAG, one indexes the documents and the question that is being asked by the user. Based on the similarity of questions and particular documents in the index, the question and the relevant document is sent to the generation model to produce the answer.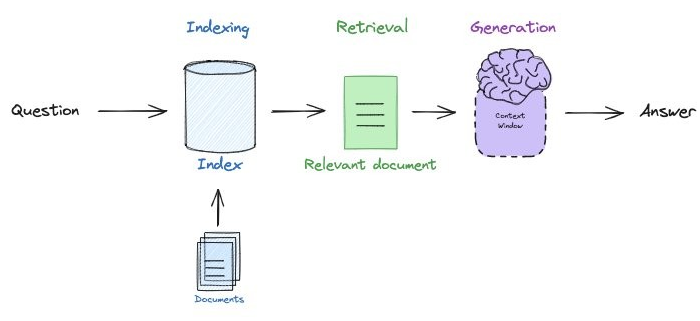
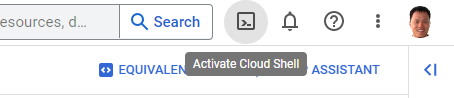
We'll be using Google's Gemini Pro as one of our models as it can be run via the course coupon and does not require students to use a credit card. The model can be easily leveraged by programs running outside of Google Cloud. To do so, we'll first need to enable its API. Navigate to the web console at https://console.cloud.google.com/, then launch Cloud Shell.
Run the following command to enable the API.
gcloud services enable generativelanguage.googleapis.comSet up an API key (Option #1: Pay-as-you-go tier)
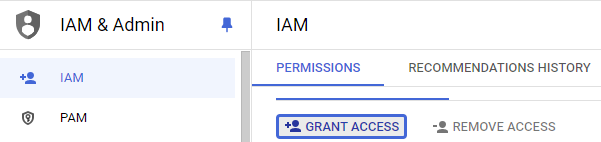
API keys that are in the pay-as-you-go tier need to be set up via Google's AI Studio at https://aistudio.google.com. Unfortunately, this site is restricted for the @pdx.edu domain. To work around this, navigate to "IAM & Admin" and click on "Grant Access"
Add a personal GMail account as an Owner of the project.
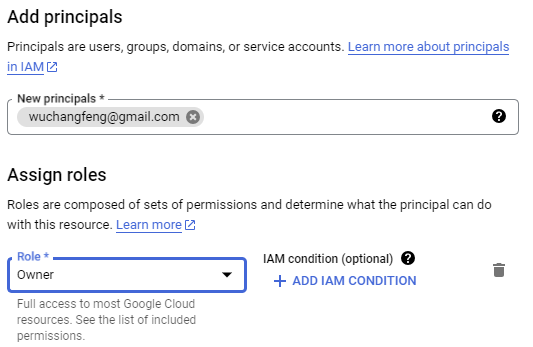
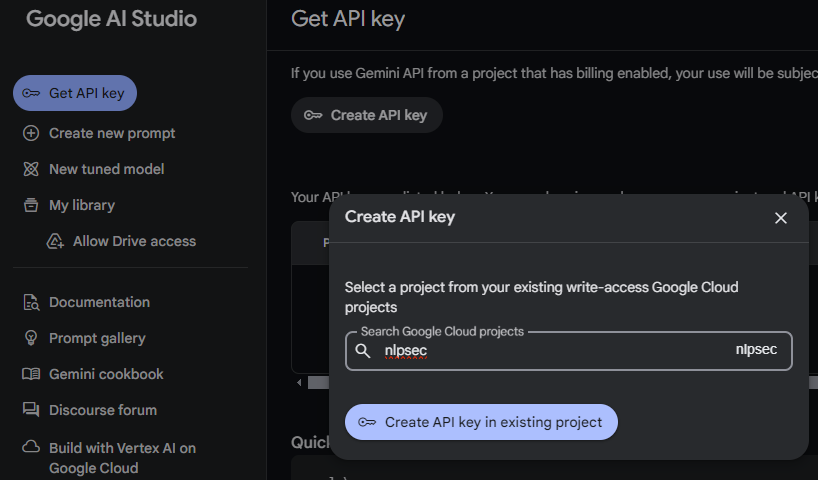
After adding your personal GMail account as an owner, an invitation e-mail will be sent to the account. Accept the invitation and join the project. Then, while logged into your personal GMail account, visit Google's AI Studio and get an API key. Select your cloud project when configuring the key.
Set up an API key (Option #2: Free tier)
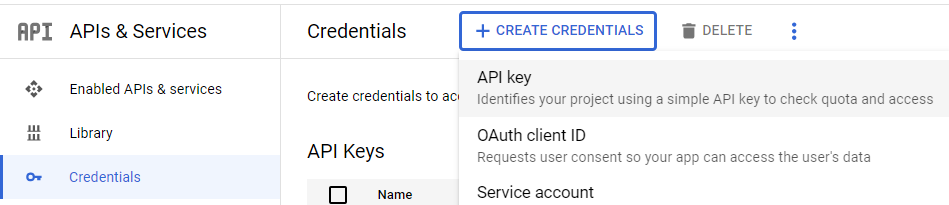
If you do not wish to use a personal GMail account, you can issue a free-tier API key instead. To do so, visit your project's "APIs & Services" and navigate to the "Credentials" section. Create a new API key.
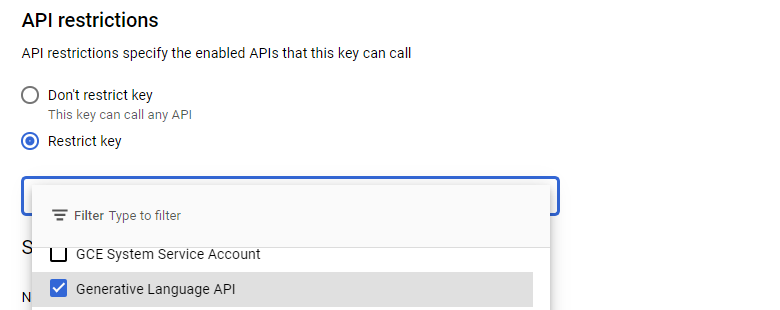
Edit the key and restrict its access to the Generative Language API that we've just enabled.
Bring up a session in Cloud Shell. Within it, set an environment variable that contains the value of the API key generated in the previous step.
export GOOGLE_API_KEY="<FMI>"Note that you can add this to your .bashrc file to automatically set the key when you login each time. Clone the course repository, change into the source directory containing the examples, create a virtual environment, activate it, and install the packages.
git clone https://github.com/wu4f/cs430-src
cd cs430-src/08*
git pull
virtualenv -p python3 env
source env/bin/activate
pip install -r requirements.txt
A simple RAG application is provided for you in the directory. Its goal is to answer questions given to it based on the web site of our Computer Science department. It is split up into three main parts: a document loading part, a document searching part, and a document querying part.
For document loading, an HTML scraper is utilized. Portland State uses AWS's CloudFront to host its web site and access to the site programmatically requires an environment variable to be set that indicates the user's web client.
export USER_AGENT='PDXAcademicClient/cs430'The document loading part takes a set of documents in a variety of formats, generates vector embeddings for them, and then inserts them into a vector database. The code first instantiates the vector database (Chroma) as well as the vector embedding model (from Google), storing the vector database locally in the filesystem.
from langchain_community.vectorstores import Chroma
from langchain_google_genai import GoogleGenerativeAIEmbeddings
from langchain.text_splitter import RecursiveCharacterTextSplitter

vectorstore = Chroma(
     persist_directory="./rag_data/.chromadb",
     embedding_function=GoogleGenerativeAIEmbeddings(
        model="models/embedding-001",
        task_type="retrieval_query"
     )
)
The program begins by first generating a list of links to retrieve by retrieving the department's web site and returning all links on the page which contain computer-science or security in them.
cs_website = "https://www.pdx.edu/computer-science"
headers = {
    'User-Agent' : 'PDXAcademicClient/cs430'
}
resp = requests.get(cs_website, headers=headers)
soup = BeautifulSoup(resp.text,"html.parser")
links = list({urljoin(cs_website,a['href']) for a in soup.find_all('a', href=True) if any(['computer-science' in a['href'], 'security' in a['href']])})
It then calls a function to retrieve each of the links. Examine the function and answer the following questions.
- Explain what the transformer does to the HTML retrieved by the loader
- Examine the document cleaning code. What kinds of characters are removed when the text is cleaned?
After the links are retrieved and their content is cleaned, the resulting documents are returned. Within the main program, they are then chunked and loaded into the vector database.
- What size chunks is the content split into?
- What amount of overlap is there between chunks?
- How many documents are loaded at a time into the vector database?
Run the code and see the links that are loaded.
python loaddb.py
We can now query the vector database to find documents that are most similar to a question that we ask. The code below performs a similarity search on the vector database.
def search_db(query):
    docs = vectorstore.similarity_search(query)
Run the code to invoke an interactive shell to search the database.
python docsearch.py
Show the document URLs that are returned for the following queries:
- Tell me about the MS program
- Tell me about the Cybersecurity certificate
- Tell me about PCEP
- Tell me about the capstone
We can now test the entire system by setting up a RAG chain that takes the user query, content in the vector database most similar to the query, and sends it to the LLM. The prompt that is used is shown below. It instructs the model to return source URLs to help us validate the content is being retrieved from the correct source.
prompt_template = """You are an assistant for question-answering
tasks. Use the following context to answer the question.  Provide the
source URLs of the context you used to perform the task and instruct
the user to visit them for more information.  If you don't know the
answer, just say that you don't know.

Question: {question}

Context: {context}

Answer: """

prompt = PromptTemplate(
    input_variables=["question"],
    template=prompt_template
)
The program then creates a function that adds the source URLs to the document content that is retrieved from the database.
def format_docs(docs):
    output = "\n\n".join(doc.page_content for doc in docs)
    sources = {doc.metadata['source'] for doc in docs}
    source_list = "\nSource: ".join(source for source in sources)
    return output+source_list
Finally, the RAG chain is instantiated that utilizes the function to create the final documents that are sent along with the user's query to the LLM.
rag_chain = (
    {"context": retriever | format_docs, "question": RunnablePassthrough()}
    | prompt
    | llm
    | StrOutputParser()
)
We can now test the chain. Run the code to invoke an interactive shell to perform queries.
python query.py
Repeat the queries from the previous section to see what is returned. You will use the content to verify the answers to subsequent questions.
- Tell me about the MS program
- Tell me about the Cybersecurity certificate
- Tell me about PCEP
- Tell me about the capstone
Then, ask the following questions and show the responses
- How many credits does it take to complete the MS program?
- How many core courses are there in the Cybersecurity certificate?
- How many hours per week does a student work in PCEP?
- How long is the capstone?

Chainlit is an open-source Python package to build production ready Conversational AI. The prior steps have initialized the vector database and implemented an LLM chain to query the documents in it. We can build a simple web interface for the application using the code below.
chainlit.py
import chainlit as cl
from query import rag_chain
@cl.on_chat_start
async def on_chat_start():
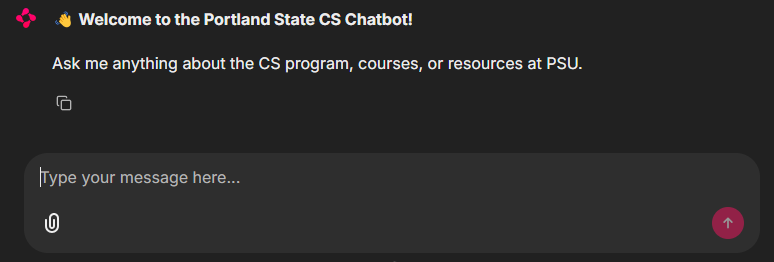
welcome_text = (
"👋 **Welcome to the Portland State CS Chatbot!**\n\n"
"Ask me anything about the CS program, courses, or resources at PSU.\n\n"
)
await cl.Message(content=welcome_text).send()
@cl.on_message
async def on_message(message: cl.Message):
user_query = message.content
answer = rag_chain.invoke(user_query)
await cl.Message(content=answer).send()
if __name__ == "__main__":
cl.run()As the code shows, we import the RAG chain from the query program, then register 2 event handlers. The first sends a welcome message when the chat interface is loaded. The other responds to a user query, sending the message to the RAG chain and returning its results. Run the application, allowing connections from all hosts.
chainlit run --host 0.0.0.0 chainlit.pyBy default, the application will listen on port 8000. Click on Cloud Shell's Web Preview icon and then change the port to 8000 to view the Chainlit application running.
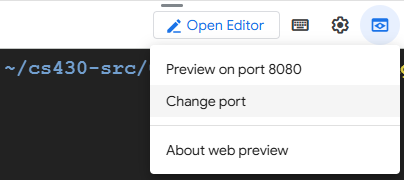
Ensure it is able to respond to your questions.
Back in Cloud Shell, Ctrl+c to exit the application.
Docker container
We can now containerize our application and deploy it on Cloud Run, giving us a serverless chatbot that can respond to our queries about the CS department whenever we want. There are two ways to containerize our application. The first would be to create a container image that only contains the Python code and build the vector database from scratch each time it is run or we can use a multi-stage Docker build to pre-populate the database in a builder image, then copy the resulting database over to the final container image. In this case, it takes longer to build the container image, but the run-time container comes up faster.
We will take the second approach for building our container image. Consider the Dockerfile snippet below that specifies a builder image that takes in our GOOGLE_API_KEY as an argument, sets an environment variable with it. It then copies the code for building the vector database over, installs the packages required, and runs the code to load the vector database. Note that because this builder image is never published, the API key used within the build is not exposed.
FROM python:3.12-slim AS builder
ARG GOOGLE_API_KEY
ENV GOOGLE_API_KEY=$GOOGLE_API_KEY
WORKDIR /app
COPY loaddb.py requirements.txt /app
RUN pip install --upgrade pip && pip install -r requirements.txt
RUN python loaddb.py
From this builder image, we can now copy the installed packages and the vector database over to the run-time container, along with the code for querying the vector database and implementing the chat interface.
FROM python:3.12-slim
COPY --from=builder /app /app
COPY query.py chainlit.py /app
COPY --from=builder /usr/local /usr/local
WORKDIR /app
CMD chainlit run --port $PORT --host 0.0.0.0 chainlit.py
DockerHub and Cloud Run
Use the snippets given to create a multi-stage Dockerfile, then build the container, substituting your DockerHub ID so that you can eventually push your image to Docker Hub.
docker build --build-arg GOOGLE_API_KEY=${GOOGLE_API_KEY} \
  -f Dockerfile \
  -t <dockerhub_id>/chainlit .
Bring up the container in Cloud Shell using port 8000.
docker run -it --rm -p 8000:8000 -e PORT=8000 \
  -e GOOGLE_API_KEY=${GOOGLE_API_KEY} \
  <dockerhub_id>/chainlit
Click on Cloud Shell's Web Preview icon and view the Chainlit application running again. Back in Cloud Shell, Ctrl+c to exit the container.
Using your credentials setup at the beginning of the course, login to Docker Hub.
docker loginThen, upload the container image to the registry using a push command:
docker push <dockerhub_id>/chainlitThen, deploy the container on Cloud Run.
gcloud run deploy chainlit --image <dockerhub_id>/chainlit \
--set-env-vars "GOOGLE_API_KEY=${GOOGLE_API_KEY}" \
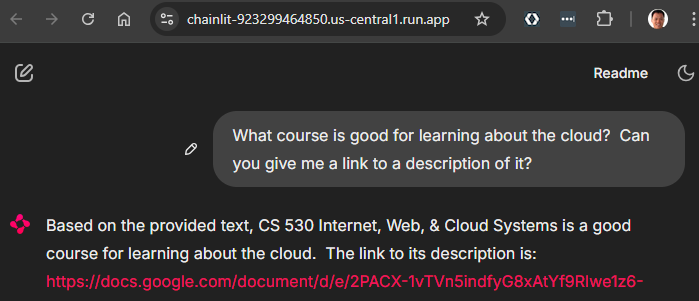
--region=us-central1 --allow-unauthenticated --min-instances 1Visit the site at its URL and query it.
- Take a screenshot that includes the URL and the results of a successful query
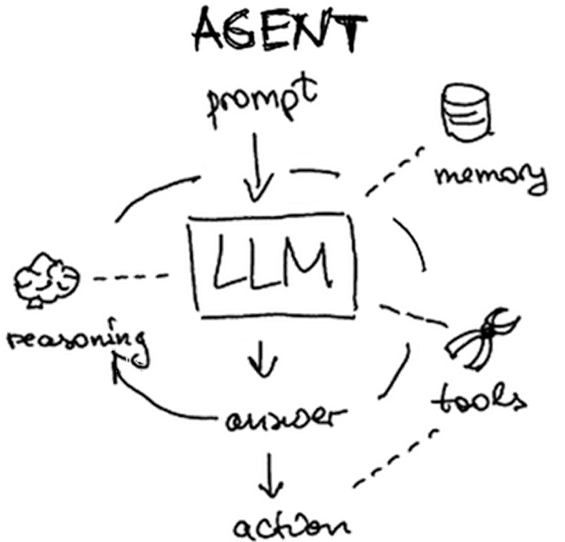
Another common application for LLMs is to construct autonomous agents. Based on a user's query, such agents are able to operate in a loop in which they produce their own plans, execute them, and view the results of execution. When they have sufficient information to answer a particular query, they return it to the user and terminate. Agents are typically configured with a set of tools that they can use to perform the execution.
One set of tools that can be provided to an LLM to execute is the OpenAPI toolkit (OpenAPIToolkit). Many web applications now utilize backend REST APIs to handle client requests. To automatically produce code that interacts with such APIs, the OpenAPI standard allows an API developer to publish a specification of their API interface which allows this to happen. Consider a snippet of the OpenAPI specification for the xkcd comic strip below. It contains the URL of the server hosting the APIs as well as endpoint paths for handling 2 API requests: one to fetch the current comic and one to fetch a specific comic given its comicId.
openapi: 3.0.0
info:
  description: Webcomic of romance, sarcasm, math, and language.
  title: XKCD
  version: 1.0.0
externalDocs:
  url: https://xkcd.com/json.html
paths:
  /info.0.json:
    get:
      description: |
        Fetch current comic and metadata.
  . . .
 "/{comicId}/info.0.json":
    get:
      description: |
        Fetch comics and metadata  by comic id.
      parameters:
        - in: path
          name: comicId
          required: true
          schema:
            type: number
   . . .
servers:
  - url: http://xkcd.com/
We can utilize the OpenAPIToolkit to access API endpoints given their OpenAPI specification. The code below instantiates the OpenAPI toolkit and agent creation function as well as utilities for loading OpenAPI YAML specifications. As OpenAPI endpoints must often be accessed with credentials, a RequestsWrapper must also be supplied that may contain Authorization: header settings for the calls. In our case, the xkcd API does not require authentication.
from langchain_community.agent_toolkits import OpenAPIToolkit, create_openapi_agent
from langchain_community.agent_toolkits.openapi.spec import reduce_openapi_spec
from langchain_community.agent_toolkits.openapi import planner
from langchain_community.utilities.requests import RequestsWrapper
import yaml
The program retrieves the specification from an open repository, loads it using a YAML parser, then creates a reduced version of the specification.
openapi_spec = requests.get("https://raw.githubusercontent.com/APIs-guru/unofficial_openapi_specs/master/xkcd.com/1.0.0/openapi.yaml").text
raw_api_spec = yaml.load(openapi_spec, Loader=yaml.Loader)
api_spec = reduce_openapi_spec(raw_api_spec)
It then instantiates the agent using the specification, the model, and the wrapper. Note that because the toolkit is able to make arbitrary API requests, it is dangerous to use and one must explicitly allow them.
xkcd_agent = planner.create_openapi_agent(
    api_spec=api_spec,
    llm=llm,
    requests_wrapper=RequestsWrapper(),
    allow_dangerous_requests=True,
)
The toolkit automatically creates tools for performing API requests. One can examine the tools using the code below. They will include a planner tool to create a sequence of API calls to answer a user query based on the API specification and a controller tool for executing the calls. We can examine them via the code below:
for tool in xkcd_agent.tools:
  print(f'  Tool: {tool.name} = {tool.description}')
Finally, the program provides an interactive shell for querying the xkcd API. Run the program.
python openapi_agent.py
Ask the questions below to test the agent and its tools.
Take a screenshot showing the results of execution
- What is the current xkcd?
- What is the image link of the current xkcd?
- What was xkcd 327 about?