Symbolic execution is an essential tool in modern program analysis and vulnerability discovery. Symbolic execution of smart contracts is a developing field, but will most likely be a useful tool for smart contract auditing and vulnerability testing. In this codelab, you will start by setting up geth, an implementation of an ethereum node as well as Manticore, a Python package supporting the symbolic execution of smart contracts.
What you will build
You will deploy a Compute Engine instance, install an Ethereum full node (geth), the manticore framework, and files for enabling the symbolic execution of smart contracts from the SI CTF.
What you'll learn
- Launching instances on Google Compute Engine
- Using
tmuxto keep sessions persistent in the VM instance - Sending transactions using a
gethfull node
What you'll need
- A Google Cloud Platform account with either the $300 initial coupon or the course coupon
- For the $300 free trial, click here
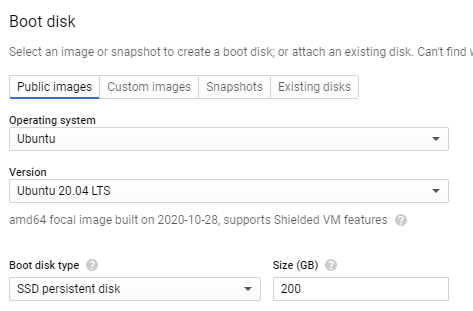
Install Ubuntu 20.04 VM
- Go to Compute Engine in Google Cloud Console
- Create instance
- Place in zone
us-west1-b - Specify an
e2-standard-4 - Select Ubuntu 20.04 for Boot disk with a
200 GBof SSD disk space.
IMPORTANT: A Ropsten node requires significant disk space that can also handle a lot of I/O. Ensure these settings are made to avoid having to redo the node later.
Setup VM
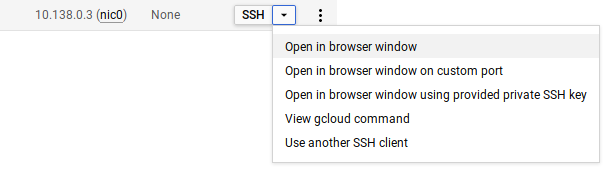
sshinto instance
- Add the Ethereum package repository, install the necessary tools on the VM, and clone the course repository.
sudo add-apt-repository -y ppa:ethereum/ethereum
sudo apt update -y
sudo apt install -y ethereum z3 python3-setuptools python3-dev cython3 build-essential
git clone https://github.com/wu4f/cs410b-src
- Download and install the version of the Solidity compiler used in the CTF and add it to your
PATH
mkdir -p ~/solidity_versions/0.4.24/
curl -L https://github.com/ethereum/solidity/releases/download/v0.4.24/solc-static-linux > ~/solidity_versions/0.4.24/solc
chmod a+x ~/solidity_versions/0.4.24/solc
echo 'export PATH=$PATH:~/solidity_versions/0.4.24/' >> ~/.bashrc
source ~/.bashrc
- Clone symbolic execution framework used for the exercises, build the packages and install them
git clone -b 0.2.4 https://github.com/trailofbits/manticore.git
cd manticore
python3 setup.py build
sudo python3 setup.py install
tmux
Within the VM, it may be handy to have multiple sessions. This can be done via tmux. Click here for a tutorial. You will want to create a tmux session with several terminals. One can be used to run the full node via geth. One can be used to run an interactive geth session that allows you to interact with contracts via Javascript. One can be used to navigate the file system. All sessions can be maintained by simply detaching from the tmux session when you are done and reattaching to the tmux session via "tmux attach". Here's some quick tips to use tmux easily.
- Launch
tmuxfrom the bash shell - Create another session in
tmuxviaCtrl+b, c - Cycle between sessions via
Ctrl+b, nandCtrl+b, p - You can detach out of this session into the host OS with
Ctrl+b, d - Then, you can reconnect with the session via:
tmux attach
To interact with the blockchain, we will instantiate and sync a geth light node with the Ropsten test network. The first time this happens, it takes time to catch up. Once caught up, however, it will be much faster on subsequent syncs (assuming you do not delete the node's data contained in ~/.ethereum). We'd also like to enable the ability to interact with our node via an HTTP JSON RPC service on port 8545. To do all of this, within a tmux session, perform the following.
geth \
  --allow-insecure-unlock \
  --ropsten \
  --http --http.addr 127.0.0.1 \
  --http.port 8545 --http.api admin,eth,net,web3,personal \
  --nousb
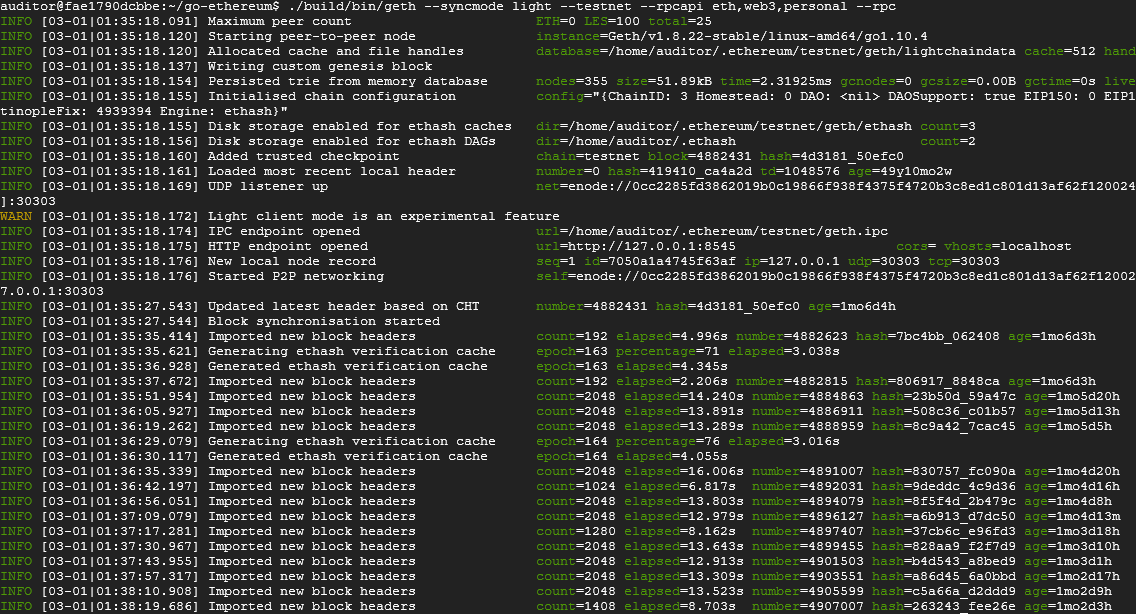
This takes a significant amount of time to complete. Two things must happen:
- The "age" counts down to zero and you have stopped importing new blocks to indicate all block headers have been downloaded
- You no longer import new state entries. Since you're only importing headers, you must collect all of the states in order to have a definitive, usable copy of the blockchain
It is only after both of these conditions have been met before you're able to deploy your exploits. Detach from the tmux session (Ctrl+b then d) and come back after several days and reattach to the session to see its progress (tmux attach).
Troubleshooting
If the command hangs or you receive an error such as:
Synchronisation failed, retrying err="peer is unknown or unhealthy"
Terminate the command (Ctrl+c). Delete the ~/.ethereum folder and try again
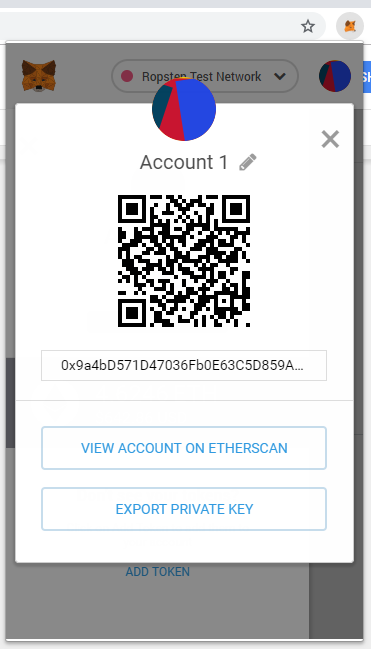
We can then interact with the blockchain through it using our wallet. To do so, we first have to import our private key from Metamask into the geth node we've just set up. Navigate through Metamask to find your private key. Don't share this with anyone as they will have full control of your CTF account and potentially solve all your levels for you.
Now, use Ctrl-b+c in tmux to get a new bash window (need to keep the geth node running while we connect to it.) All of your windows will show up as a list in the bottom left, with an asterisk next to the one you're currently viewing. You can navigate through your tmux windows with: Ctrl-b+n and Ctrl-b+p
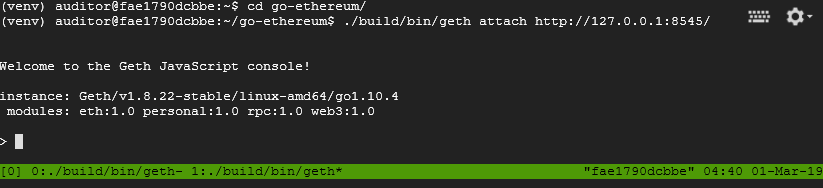
Connect to your running geth node with:
geth attach http://127.0.0.1:8545/
Now you're ready to import your private key with:
personal.importRawKey('put the key you copied from metamask here', 'add a password here')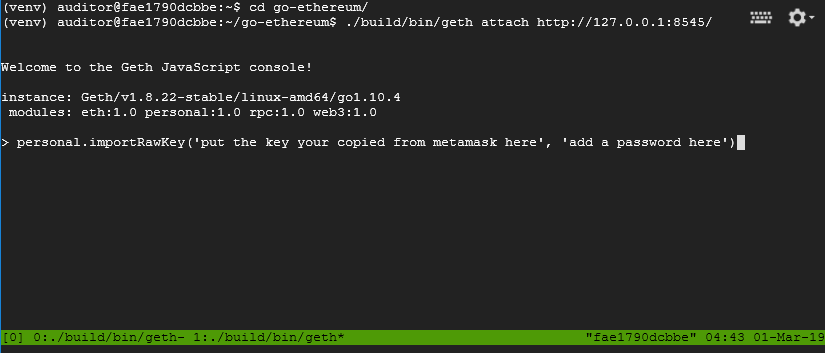
You can unlock the account using the password you just set for a particular duration (e.g. 1 hour) as shown below:.
personal.unlockAccount(eth.accounts[0], '<password>', 3600)
We must wait until we are caught up before sending a transaction.
It is important that you keep the tmux sessions you've just set up running throughout the rest of the quarter in order to keep syncing the blockchain state and to save yourself time when performing the labs.
To do so, disconnect from the tmux session by performing
Ctrl-b+d
This will put you into the original shell on the VM.. We can then safely exit the VM shell and the tmux session will remain running. You can then exit from the Ubuntu 20.04 VM.
To reconnect to your session, ssh back into your VM instance on Compute Engine, then perform a "tmux attach" to re-establish your sessions. In order to ensure that geth is done syncing, in the console, issue the following to get the latest block number:
eth.blockNumberThen, visit https://ropsten.etherscan.io to see that it matches the latest block.
You have now set up an Ethereum node using geth that you can now use to interact with the blockchain directly (rather than going to nodes hosted by companies such as Infura). We will need access to this node for running our symbolic execution exercises with Manticore.
What we've covered
- Set up an Ethereum light node
- Setting up the node with our wallet information from Metamask